Rebuilding the Grey Holden engine
Page 1: Strip down, inspection, machining
We needed a replacement engine to use in the FJ sedan while the original (smokey, rattly, generally sad) engine is being reconditioned. It will probably be swapped from car to car as I go through refreshing the engines - the grey motor will go in everything from FX to EJ.Click on photo's to enlarge.
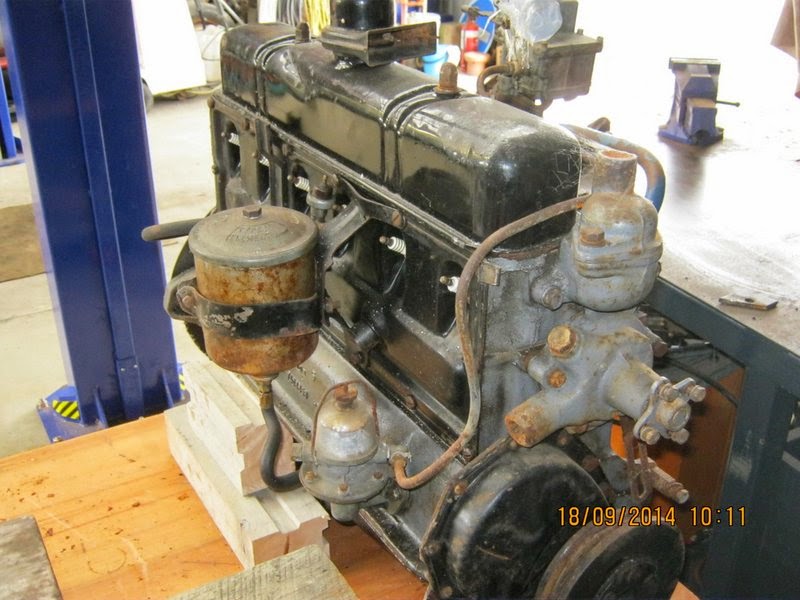
I sourced a grey "138" engine on Trademe - these things are a bit of a lottery, but the motor turned out to be okay (albeit not actually a 138). I thought at first we might get away with a simple "ring & bearing" rebuild. It was not quite as simple as that (of course), but I didn't want to do a full recondition on an engine that was basically going to be used as a spare - just a budget freshen up should suffice.

The engine numbers had been "damaged" - almost like they had been attacked with a grinder. Uuuum? I guess this engine has a chequered past? Anyway, its bore size & casting numbers identified it as a 132 cu. in., probably from an FE.

Cylinder head looked to be in good shape - valves, guides, seats had minimal wear. This was a major plus, because reconditioning a cylinder head can double the cost of a rebuild.

The block itself was reasonably clean and there was just one damaged thread on the deck. If there is a pronounced lip at the top of the bores, this must be removed with a ridge-reamer before removing the pistons or else the rings and/or pistons could be damaged if you try to force them out. There was minimal bore wear on this engine, so I gently eased the pistons out of their cylinders.
Pistons were +.020" and had land inserts on the top ring groove, so this engine had obviously been rebuilt at least a couple of times before. They looked like they would do another turn after a good clean. Bores measured within wear limits, and no scoring was evident.


However, the rings were mostly seized in their grooves and had some interesting wear damage.
Crankshaft was at -.020" BE and -.010" mains. The shells were quite worn and scored, but (critically) had not worn through the bearing material to the steel backing. It looked to me like a journal polish and a set of new shells would do it.

 Oil pump was pretty caked and the strainer mostly blocked, so I
expected to find it pretty worn.
Yep - the backlash between the helical pump gears is .018" - over three times the spec.
 The rest of the pump body and cap is pretty good, so I'll try to source some new gears rather than a whole pump to keep costs down.
It turns out new gears are available from RevHeads in Australia for Au$250. They charge a lot for postage, handling & insurance, though.


The crank damper requires a special puller (pictured) that I don't have yet (hurry up Al!), so I left it for the engine reconditioners to remove.
Off to the reconditioners for an expert opinion. They agreed that the bores & pistons were good for another turn after cleanup/hone, although the rings would have to be made for it. One of the crank journals was a bit far gone and we decided on a full regrind to -.020" main & -.030 BE.


It all came back clean as a whistle (love those acid tanks!), thread repaired, deck surfaced, new cam bearings installed, supplied the main/BE shells, rings, etc.

The head was acid-tanked, crack tested & surfaced. Ready for valve lapping, final clean & reassembly.


The rocker gear was very gummed up and I had to use the press to get the pedestals off.
If anyone doubts the worth of dismantling & cleaning the rocker shafts, check out the screwdriver at right with some of the gunk from inside the shaft on it. Yuk.
So - on to a bit of prep work, a final clean, and assembly (P2).
No comments:
Post a Comment