Rebuilding the Grey Holden engine
Part 2: Block prep & assembly
Okay, the block, covers & internals are back from the reconditioners. Time to clean & check everything and start reassembly.

VERY important to chase all the block threads with the correct, high-quality tap and blow them out with compressed air. Clean threads are essential to ensure correct clamping forces.
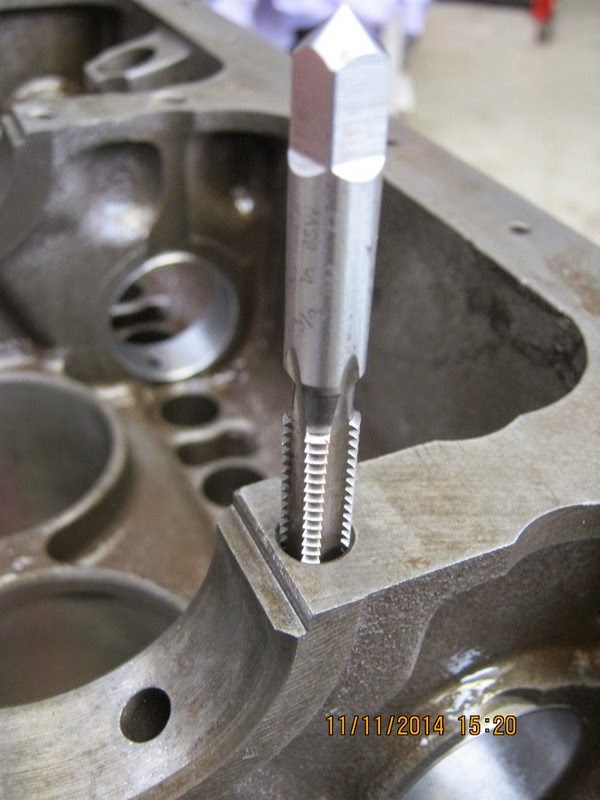
This includes the main bearing cap bolt holes. A good quality tap and plenty of lube will ensure you don't damage the threads.

This is the type of tap to use - with a short tapered lead-in so you can clean near the bottom of blind holes. Flat-ended "plug taps" are also available and work well.

Also, check the head bolt holes in the deck to make sure none of the threads has pulled up proud of the deck surface - relieve them with a (good quality) countersink if they have. This block has had the
deck surface ground, but I will still go 'round with the countersink and put a light chamfer on the holes. Likewise, all the bolts must be wire-brushed and the threads inspected for damage.

Rings were supplied in "file-fit" size, which means they must be gapped by pushing each one squarely into the bore and filing the ends of the rings until the gap is within spec. This can take a while, but it is important to get it right.

On engines which have not been rebored, the rings must be gapped on a relatively unworn part of the cylinder. This means the bottom of the bore, and it is easiest to do this by inverting the block and pushing the ring in from the bottom.
Because the bores are too small to get my hand down them, I gave them their final clean before fitting the crank so I could get to the top & bottom of the cylinders. Clean means clean with the bores (as with all internals). Solvent and paper towels is the go - keep cleaning until the white paper towels stay white.
Running a rifle cleaning rod with solvent through oil galleries in the block and crank before blowing them out with air is the best way to ensure they are completely clear. This crank has been ground & cleaned by the reconditioners, but a final thorough clean before assembly is necessary.


All painted up and *almost* ready to fit. Just waiting on those oil pump gears and some new mounts. Also, the front mounting plate is wrong (see Engine Swap page). The colour is not genuine Holden Grey, but some "machinery grey" spray cans that I got from Super Cheap Auto.
 New pump gears installed - the clearance between the helical teeth is now .0045" - .005", exactly as specified. These are high-quality items, although bloody expensive at $300 incl. freight, etc. from Aussie. Still, the venerable grey needs all the help it can get in the oil-feed department, so I think it is money well spent.
The pump refitted.

Cork gaskets & seals on the sump. The end seals need to be cut to fit - they should fit snugly against the cork rail gaskets. I just use grease on cork gaskets and this usually makes for a good seal. In this situation, however, a blob of good quality sealant on each corner of the front & rear main bearing caps is necessary to prevent leaks.

 The crank damper had corrosion and mild pitting on the seal surface. This would leak even with a new seal, so I cleaned it up with emery paper and it came up alright. This surface could be reground or a sleeve fitted if it's too far gone - or a new damper is about $200.
This can be a problem area with many engine swaps - even if the motor going in is very similar to the one coming out. It is very important to take the time to ensure the various pulleys are in alignment - this is a common (un) reliability point on swapped (non-factory) engines. If components are mis-aligned or not mounted securely, the belt will wear quickly, squeal and possibly break. It also puts extra loads on the generator and water pump bearings. With this engine, the water pump and crank pulleys line up well.

But the earlier motor uses a thicker "A" series fan belt and someone had drilled out the front lower generator mount, so I had to make up a stud for that and a spacer for the rear mount.

You can see here that the alignment is good. Making sure of details like this makes for a much more dependable build.

Flywheel had a good layer of corrosion because the motor had been sitting for some time before I bought it. But it cleaned up well and showed no signs of warping or scoring.

Its important to make sure the mating faces on the crank flange and the flywheel are clean and flat (no burrs, etc.). I also like to run a tap through the bolt holes to be sure everything clamps up properly.

Make sure the mating surfaces of the pressure plate are clean, and check the plate surface for warping or scoring after cleaning it up with emery.

Bolted together and ready to go in.
No comments:
Post a Comment